Render a Transparent Twitch Chat Overlay (MOV with Alpha) in 2026
A transparent chat overlay is a video file — a MOV with an alpha channel — containing only the rendered chat scroll. No background. Drop it on a video track in your editor and the gameplay shows through. This is how every polished Twitch highlight reel handles chat. The two paths in 2026 are TwitchDownloaderCLI (free, technical) and vod.ing (browser, no CLI). This guide covers both, end to end.
What “alpha channel” actually means
An MP4 file, in any normal configuration you will encounter, has three color channels: red, green, blue. Whatever sits behind your chat — a black box, a green screen, a chroma key color — gets baked into those three channels permanently. There is no per-pixel transparency information stored anywhere in the file.
A MOV file with the right codec carries a fourth channel: alpha. Each pixel has an opacity value from fully transparent (0) to fully opaque (255). When your editor reads the file, it knows which pixels are “real chat” and which are “show the layer beneath.” No keying, no color spill, no fringing.
The codecs that carry alpha inside a MOV are:
- ProRes 4444 — Apple’s standard for alpha. Universal editor support.
- ProRes 4444 XQ — higher bitrate variant, identical alpha handling.
- QuickTime PNG — lossless, larger files, ancient but works everywhere.
- QuickTime Animation — RLE-compressed, good for graphics with flat regions.
The codecs that do not carry alpha in their standard configurations: H.264, H.265 (HEVC), VP9 in WebM, AV1. These will silently flatten your chat onto a solid background. Premiere Pro, DaVinci Resolve, and Final Cut Pro all import MOV alpha natively — no conversion step required.
The two paths compared
TwitchDownloaderCLI is free, command-line, open source, and gives you control over every render parameter. The trade-off is setup: you need a terminal, FFmpeg installed, and the patience to read flag documentation. Render time on a 4-hour stream’s chat is roughly 30 minutes on modern hardware. Animated 7TV emotes are partially supported but require extra configuration.
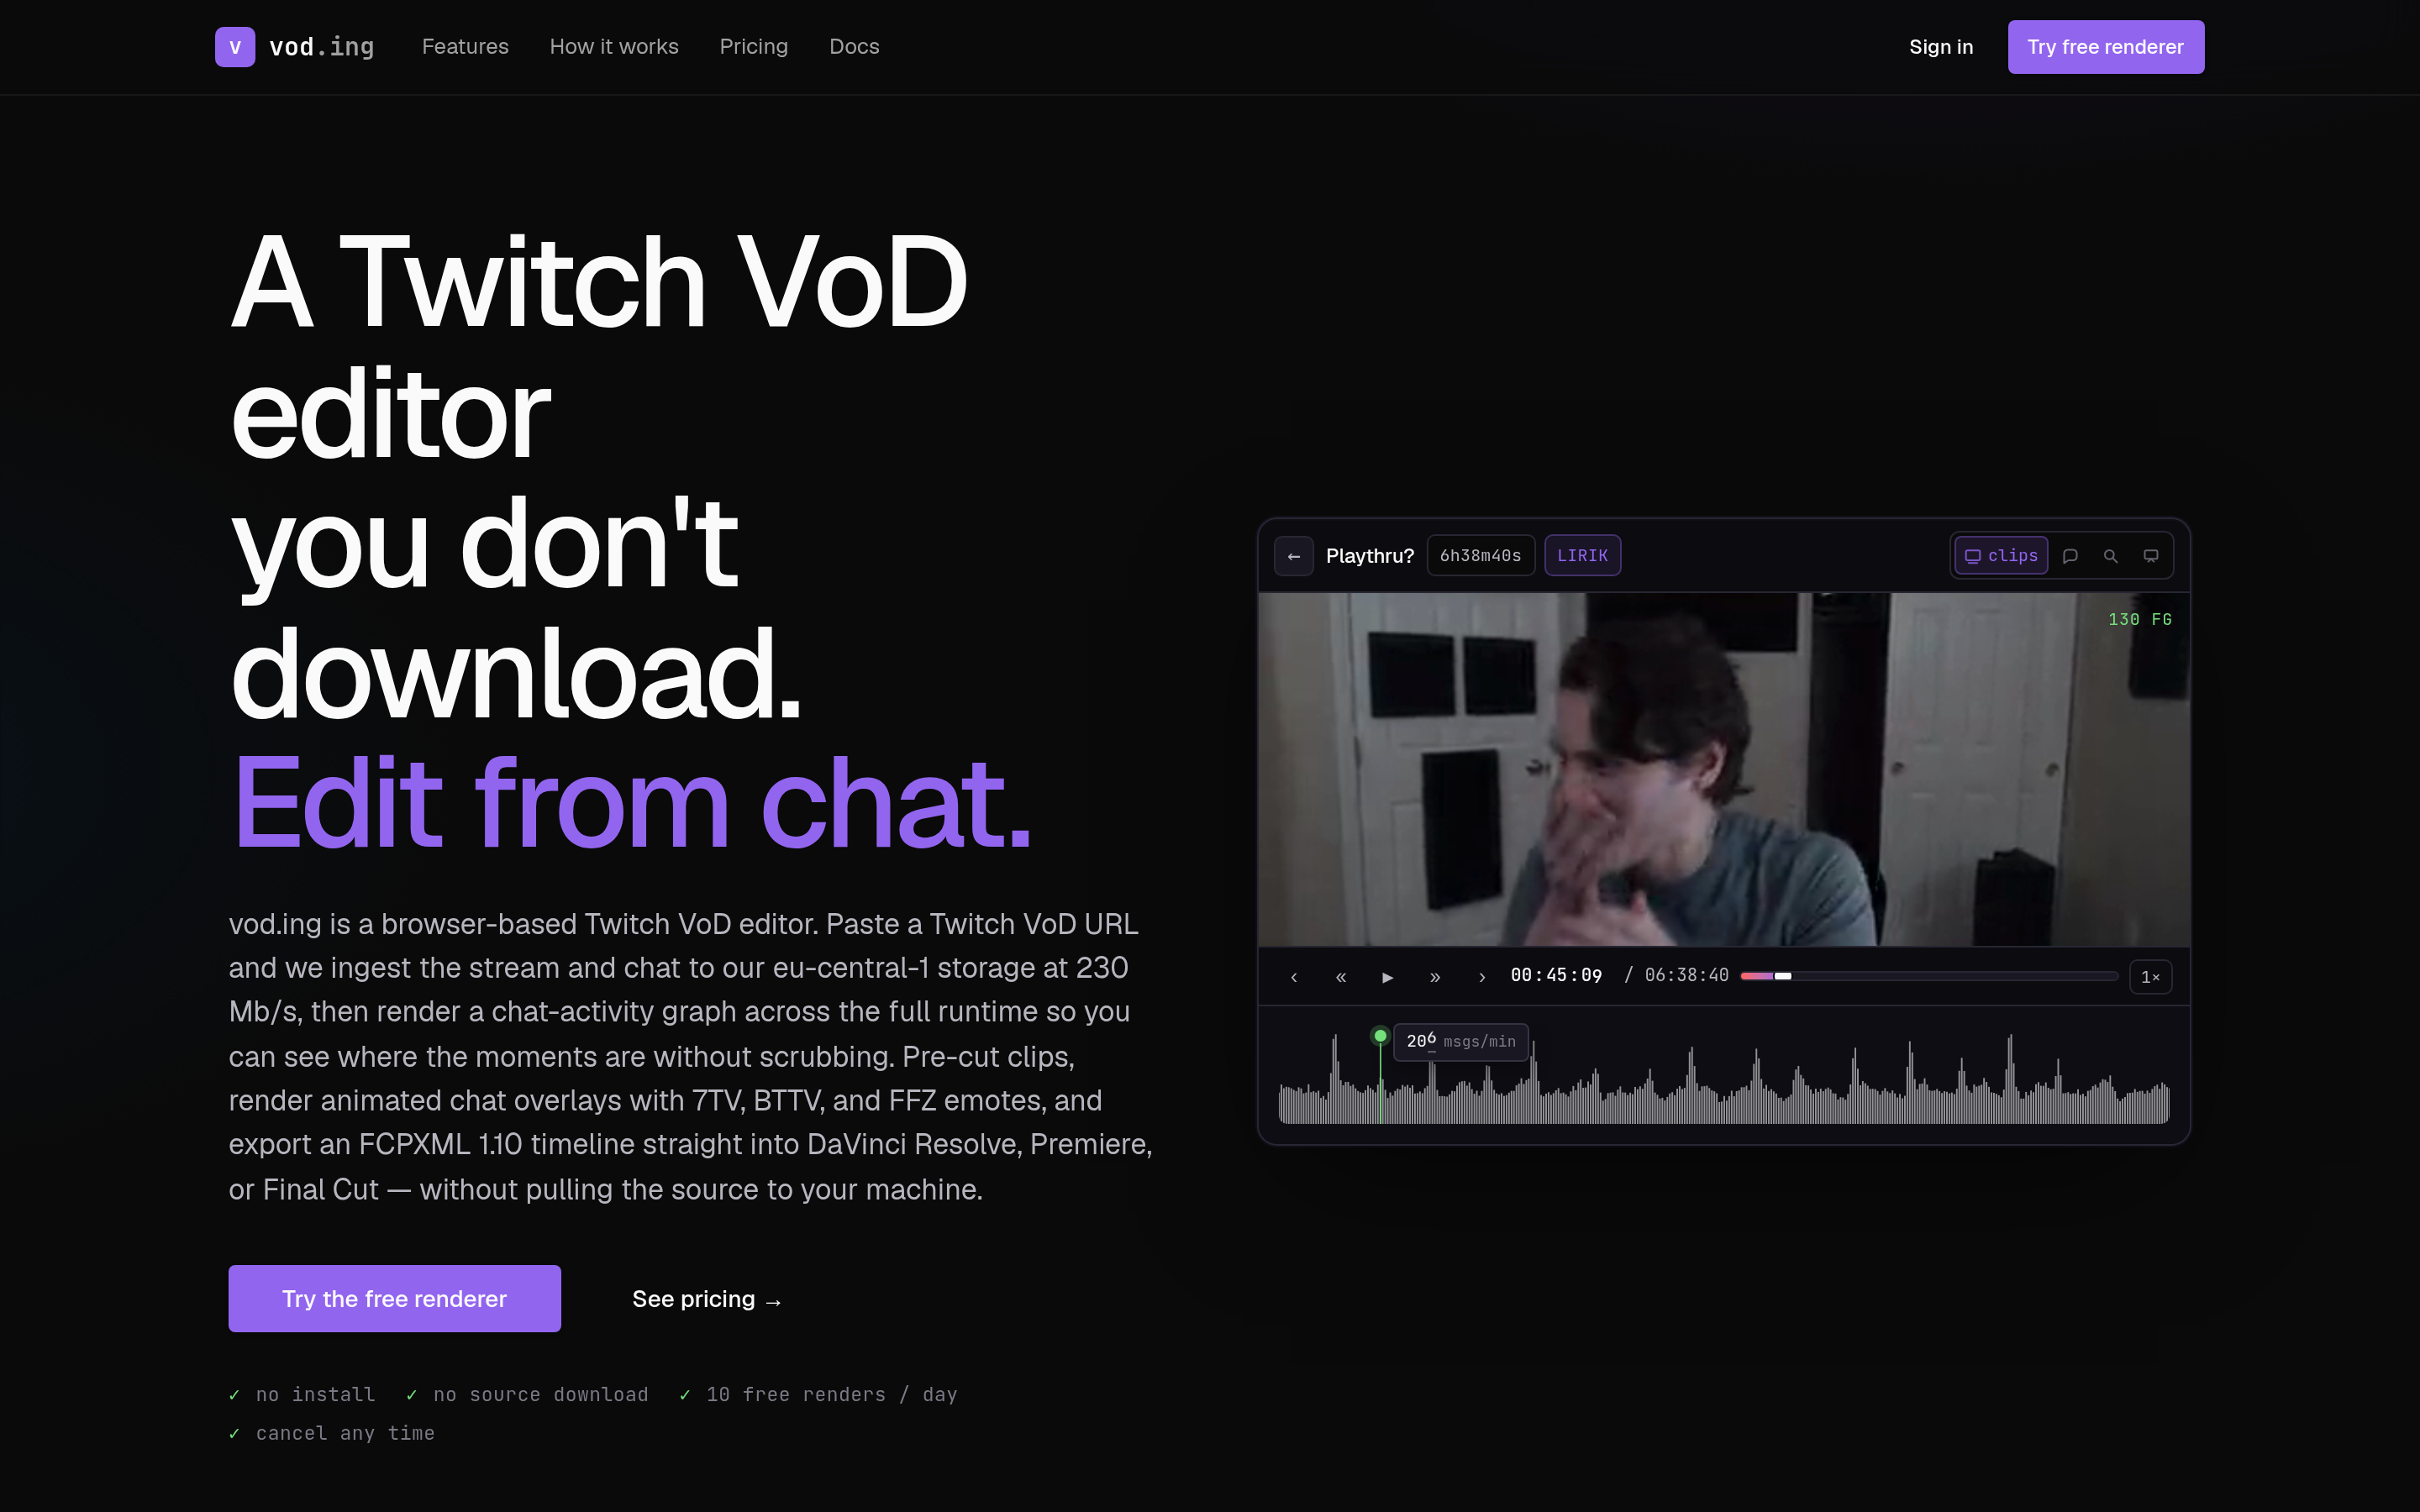
vod.ing is browser-based. Paste a Twitch VOD URL, click render, MOV downloads. Animated 7TV, BTTV, and FFZ emotes render correctly with no flags. The free tier is 10 renders per day with a 3-minute clip cap, which covers most highlight work; paid removes both limits.
If you are editing one stream a week and care about animated emotes, vod.ing saves an hour. If you are batch-processing a season of VODs and want scriptable automation, TwitchDownloaderCLI is the right tool.
Path A: TwitchDownloaderCLI step-by-step
Install
Download the latest release from github.com/lay295/TwitchDownloader/releases. Builds are available for Windows, macOS (Intel and Apple Silicon), and Linux. The CLI binary is named TwitchDownloaderCLI (or TwitchDownloaderCLI.exe on Windows). Drop it somewhere on your PATH or call it from the directory it lives in.
You also need FFmpeg available system-wide:
- macOS:
brew install ffmpeg - Windows:
winget install ffmpeg - Linux:
apt install ffmpegor your distro’s equivalent
Confirm both are working:
TwitchDownloaderCLI --version
ffmpeg -version
Step 1: Get the VOD ID
From the Twitch URL https://www.twitch.tv/videos/2348567812, the ID is the trailing number — 2348567812. That is the only piece of input you need.
Step 2: Download the chat JSON
TwitchDownloaderCLI chatdownload --id 2348567812 -o chat.json -EThe -E flag embeds emote images (BTTV, FFZ, 7TV, plus standard Twitch and subscriber emotes) directly into the JSON file. This means the render step in Step 3 can run fully offline and you do not get rate-limited by third-party emote APIs mid-render.
For a long stream, the JSON file can grow to 200–500 MB with embedded emotes. That is normal.
Step 3: Render the chat to MOV alpha
TwitchDownloaderCLI chatrender -i chat.json -h 1080 -w 422 --framerate 30 --update-rate 0 --font "Arial" --font-size 18 --background-color "#00000000" --message-color "#FFFFFFFF" --offline --output-args="-c:v prores_ks -profile:v 4444 -pix_fmt yuva444p10le "{save_path}"" -o chat-overlay.movWhat each flag does:
-h 1080 -w 422— render dimensions in pixels. Chat is taller than wide, so height is the larger number. 422px wide matches a typical sidebar width on a 1920x1080 timeline.--framerate 30— matches typical streaming output. Use 60 only if your final timeline is 60fps.--update-rate 0— render every frame, smoothest possible scroll. Higher values sample less often (faster render, choppier scroll).--background-color "#00000000"— the trailing00is the alpha byte. Two zeros = fully transparent.--message-color "#FFFFFFFF"— opaque white text. TrailingFF= fully opaque.--offline— render only from emotes embedded in the JSON. No network calls.--output-args— passes raw FFmpeg encoder flags.prores_ksis the encoder,profile:v 4444selects the alpha-capable ProRes profile,pix_fmt yuva444p10leis the 10-bit YUV+alpha pixel format that editors expect. See the FFmpeg ProRes documentation for the full profile list.
Common errors
“ffmpeg not found” — install FFmpeg system-wide using the commands above, then restart your terminal so PATH refreshes.
MOV opens but chat is on a black background — you used a non-alpha codec or skipped --output-args. Re-render with the prores_ks profile:v 4444 line above.
Animated emotes are stuck on frame 1 — set --temp-path to a directory with at least 5 GB free and re-run. See the emote section below.
Path B: vod.ing step-by-step
Paste a Twitch VOD URL into vod.ing. The chat is detected and indexed automatically. Preview the rendered overlay live in the browser, choose your dimensions, font, and font size, then click Render. The MOV downloads when complete.
The free tier handles clips up to 3 minutes and 10 renders per day, which is enough for highlight clips and TikTok-length cuts. The paid tier removes the time cap and the daily limit.
The advantage over TwitchDownloaderCLI is concrete: no CLI, no FFmpeg setup, animated 7TV emotes work out of the box (TwitchDownloaderCLI renders animated emotes as static frames by default — there is a --badge-filter-mode workaround but it is finicky and not always reliable on long streams), and the result can be sized to the exact aspect ratio of the clip you are editing rather than a fixed sidebar width.
Dropping the overlay in your editor
Premiere Pro
Import the MOV (File → Import) and drag it onto V2 above your gameplay clip on V1. Premiere reads the alpha automatically. If the background still appears solid, open Effect Controls → Opacity and confirm Blend Mode is set to Normal — Premiere occasionally defaults to a multiply or overlay mode after certain transition effects.
DaVinci Resolve
Import to the Media Pool and drag to V2. Resolve auto-detects alpha for ProRes 4444. If it does not, right-click the clip → Clip Attributes → Alpha tab → set to Straight for vod.ing exports and TwitchDownloaderCLI ProRes 4444 output. (Premultiplied is correct only for renders that have been pre-baked against a known background, which neither tool does by default.) For a fuller editing pipeline see the DaVinci Resolve workflow guide.
Final Cut Pro
Import and drop the MOV directly on top of the gameplay clip. Alpha is handled automatically — FCP and ProRes are first-class together.
CapCut
Trickier. CapCut’s free tier has limited alpha-channel handling and frequently flattens MOV alpha to black on import. The reliable workaround is to render the chat against a chroma-key green background instead of transparency:
--background-color "#00FF00FF"Then key it out in CapCut using its built-in chroma key effect. This is one of the few cases where TwitchDownloaderCLI’s manual flag control beats vod.ing’s web UI — you can flip a single hex value and re-render.
7TV, BTTV, and FFZ emote handling
Third-party emotes are the difference between an overlay that looks generic and one that looks like the actual stream. A polished render needs all three providers:
- 7TV — the modern dominant network, supports animated emotes (looped GIFs and WebPs).
- BTTV — older network, mostly static emotes, still widely used.
- FFZ — FrankerFaceZ, mostly static, mostly mod and viewer custom emotes.
In TwitchDownloaderCLI the flags --bttv, --ffz, and --stv (the 7TV flag is stv for SeventTV) all default to true, so emotes from all three networks load automatically. Animated emote rendering is the bottleneck. To enable it properly:
--temp-path /path/to/scratch --stv-emotes-tier 1The temp path needs enough free space — long streams with many animated 7TV emotes can balloon the scratch directory to 5+ GB during render. If the disk fills, the render silently falls back to first-frame rendering for emotes.
vod.ing renders animated emotes as actual animations with no flags or scratch directories to manage. For the broader context on chat overlay strategy across editing styles, see the chat overlay pillar.
Performance tips
A 4-hour chat at 30fps takes 20 to 60 minutes to render depending on hardware and chat density. Ways to speed this up without ruining the result:
- Lower framerate to 15fps for slow chats — chat that is mostly periodic single messages does not benefit from 30fps motion. The smooth scroll is invisible at low message rates.
- Use
--update-rate 1.0— render motion-sample only once per second. Cuts render time by roughly half on chat-heavy streams. Slight stutter on fast scrolls. - Reduce dimensions — if the overlay sits in a 300px sidebar in the final edit, do not render at 600px. Match render width to display width.
- Proxy in Premiere or Resolve — generate a low-res proxy of the MOV and offline-relink to the full-quality file at export time. Speeds up the editor timeline, alpha behavior is unchanged.
When you don’t need a transparent overlay
If you are streaming live with OBS and want chat visible to viewers in real time (not added in post), you do not render a video file at all. You add a browser source pointed at ChatIS, fChat, or StreamElements and the chat appears live in your scene. That is a different workflow and outside the scope of this guide — this article is for post-render only, where you are editing a recorded VOD into a clip or highlight reel and need chat composited cleanly over gameplay.
For the upstream step (downloading the VOD video file alongside the chat), see the complete VOD download guide. For everything else chat-overlay-related, the pillar index is the hub.